Archive for the Rules Category

Version 3.4.2 ready

Posted in Intercept, Rules on October 25, 2015 by Mr Backman

System Defense Boats. Looked down upon by the Imperial Navy with their huge warsships and noble heritage. Yet the local defense by the SDBs is essential as it locks up forces to guard already taken systems. The SDBs hide on planets with atmospheres, on asteroids in the belts or inside the atmospheres of gasgiants. There they stay, for months, waiting for an opportunity to strike back. Lacking jumpdrives, an SDB always outgun a warship, ton for ton or Megacredit for Megacredit. This lack of jump capaility is also their achilles heel, they rely on fragile Jumpshuttles to ferry them outsystem or to rotate their crews.

3.4.2 changes

Well, I have been busy haven’t I. Lots of large and small changes in the rulebook and designs. Aerobraking, landing, crashing, taking off, ramming or docking have been updated and clarified. A ship’s signatures and scan changes when on a planet, asteroid or hovering in gasgiant atmosphere have been added. Lots of little changes here and there, updated designs and design system to make Visual(Hull) and the effects of being in sunshine or darkness are in, all ready ship designs updated.


Scan procedure

At the sensor phase of each gameturn players take turn calling scans that the opponent then handles. Maximum two scans per side per turn regardless of the number of ships and you cannot use the same sensor twice in a turn. The player with lowest Initiative scan first, describing both scas to the target player before the target responds. This is so you don’t learn something from the first scan when planning the second scan. When both scans have been resolved it is the high Initiative players turn to do two scans and the low Initiative player to respond.

A scan consist of a type (Visual, IR, Radar, Neutrino or Mass), strength (sensor strength modified by scan size and ship damage), size (5 x 5 boxes, 3 x 3, boxes, 1 box, 3 x 3 squares or 1 square scans in inceasing strength but smaller area) and the center (box or square depending on).

Now it is the target’s turn to ask a number of questions, which questions depends on where the scan was placed. Below I’ll describe three consecutive scans on three turns by one side (player A) and the questions and results from player B. These examples are also available in the rulebook, on page 11.

Scan 1
A has his ship located in 1 and decides to do a 1 box Scan in box B4. His Sensor is +2 and the scan modifier for a 1 box scan is -1.
Player A ”I have a visual scan, strength +1, one box large, in box B4.”
Player B ”Does your Scan touch your ships Sunglare column?”
Player A ”Yes, my Scan touches my sunglare, dammit!”
Player B ”Is your scanning ship inside a gravity well?”
Player B ”No it does not scan from within gravity”
There could have been up to three more questions but none of them apply.
The scanner grudgingly admits that the Scan does touch his Sunglare column so the target reduce his Scan strength by -6 to an abysmal -5. If the target had ships or missiles inside the entire Scan he would hav added -5 to their Visual(Hull) and Visual(Thrust) signatures and if the sum came up 0+ he would have told the scanner the sum, given the position of the target(s) to him and the scanner would do a Sensor  task roll to see if ge got a Tracked result. The target player now also knows that the scanner’s ship is somwhere below the box.
I have colored the entire Scan 1 orange because of the Sunglare strength reduction, the Scan is still valid but very weak. Don’t stare into the sun.

Scan 2
Player A has moved his ship into position 2 and decide to do a huge 3×3 box scan centered around E1. The scan modifier for a 3×3 scan is -3 so his Scan strength is -1.
Player A ”I have a Visual Scan strength -1 three by three boxes in box E1.”
Player B ”Does your Scan touch your ships Sunglare column?”
Player A ”No it doesn’t. I have learned my lesson”
Player B ”Is your scanning ship inside a gravity well?”
Player A ”Eh, yes it is”
Player B ”OK, what blocked near and far sector touches your scan?”
Player A ”The northeast near and far sector”
Player B ”Thanks, are you scanning from the shadow column”
Player A ”No”
The northeast near and far sector is colored gray in the pictures. If player B had any ships or missiles inside the parts of the scan inside northeast near and far those targets would have been ignored. The near is simply the gravity sector and far extends from that forever. The Scan touches the Sun column but as player A wasn’t scanning from the Shadow column this had no effect.
I have colored the parts of the scan that should be ignored in red.

Scan 3
Player A has drifted into position 3 with the help of gravity. He decides to do a 3×3 box Scan in E4. He figures the Shadow column will protects him from Sunglare. The Scan strength is -1.
Player A ”Visual Scan strength -1 three by three boxes in E4.”
Player B ”Does your Scan touch your ships Sunglare column?”
Player A ”No”
Player B ”Is your scanning ship inside a gravity well?”
Player A ”No”
Player B ”Are you scanning from the shadow column”
Player A ”Yes”
Player B ”Your scan touches gravity, what blocked near sector does it touch?”
Player A ”Damned! The north near sector is blocked”
The Sun column as well as the near north sector will be ignored but most of the Scan is still valid as you can see. Had his scanning ship been 3 squares to the right none of the Scan would be blocked but he would suffer Sunglare.
I have colored the Sun column and north near sector of the Scan in red.

Scan procedure examples

As you can see, the procedure is quite simple: Scanner decides on a scan, tells type, strength, size and center to the target. The target then asks a bunch of questions and depending on the answers certain parts of the scan will be ignored.

Don’t stare into the sun you hippy you!

Bloodmoon

Posted in Intercept, Rules on October 3, 2015 by Mr Backman

Blood-moon

The lunar eclipse which coincided with the moon being closest to earth was a rare thing indeed. It won’t happen again until 2035. Too bad it was overcast as usual here in Uppsala but it got me thinking about a scenario during an eclipse. Download the scenario Data cards and the eclipse map here, and the latest rules etc here.

A Mercenary cruiser without its onboard cutters, is tasked with prohibiting drug runners from Luna to land. The lunar cartel launches two ships, one Freetrader and one Fartrader, both unloaded to try to land on earth while the mercs job is making sure they don’t. The Broadsword class is pretty hard to damage by the traders but Surface, Power and Thrust sections can be damaged. If both tráders surviva landings that side wins a major victory, if only one trader lands the traders win a marginal victory. If none of the traders manage to land the mercenaries win.

Traders start two squares south in the lunar shadow column, the mercenary cruiser start two squares north in the earth the sun column (which is 3 squares wide), speed is 0 in both cases. Broadsword is side A and the traders side B. If you want you can play this as a three player scenario where Broadsword is A, Fartrader is B and Freetrader is C. Whoever lands first wins, if nobody lands the mercs win.

Broadsword

High Gs and very tough to damage but you’ll have to hinder two separate ships from landing.

  • 2.9 Gs. 2G every turn, 3G on turn 1, 2 and 3 of every four turns.
  • -2 on beam firing when thrusting due to underpower.
  • +0 Visual/IR, +2 Radar.

FreeTrader

Low Gs but OK Visual/IR sensor and cold start missiles

  • 1.8 Gs, 1G every turn, 2G on turn 1, 2 and 3 of every four turns.
  • -2 on beam firing when thrusting due to underpower.
  • -1 Visual/IR, -3 Radar
  • This ship has 3G15 Coldstart missiles instead of the usual 5G15 used by the FarTrader

FarTrader

High Gs but easy to spot and shitty Visual/IR sensor

  • 2.5 Gs, 2G every turn, 3G on turn 1, and 3 of every four turns.
  • -2 on beam firing when thrusting due to underpower.
  • -3 Visual/IR, -3 Radar

This scenario will teach you how Sun column and Shadow column works so look that section up and read carefully. Also note that your landing must take aerobrake into account, don’t try to land with too high speed as this may cause your ship to burn and crash.

Nukes in space!

Posted in Intercept, Rules, Traveller on April 6, 2015 by Mr Backman

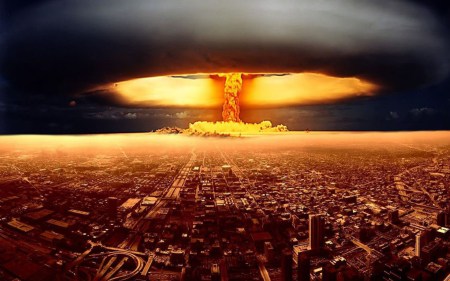
Atomic blast

Humankind have detonated 17 nuclear devices in space during the cold war the largest being the US Starfish at 1.4 Megatons. From Wikipedia:

“Starfish Prime produced an artificial radiation belt in space which soon destroyed three satellites (Ariel,TRAAC, and Transit 4B all failed after traversing the radiation belt, while Cosmos V, Injun I and Telstar 1 suffered minor degradation, due to some radiation damage to solar cells, etc.).”

“The worst effects of a Soviet high-altitude test occurred on 22 October 1962, in the Soviet Project K nuclear tests (ABM System A proof tests) when a 300 kt missile-warhead detonated near Dzhezkazgan at 290-km altitude. The EMP fused 570 km of overhead telephone line with a measured current of 2,500 A, started a fire that burned down the Karaganda power plant, and shut down 1,000-km of shallow-buried power cables between Aqmola and Almaty.”

If you are playing in the Traveller setting nukes are only allowed by the Imperial Navy or System defense forces and can only be used in wartime. Mercenary slang for wars involving nukes is ‘Bad war’, all other wars are called ‘Good war’.

Missile nuke option

  • Large nuclear missile TL 6+
  • Medium nuclear missile TL 7+
  • Small nuclear missile TL 8+

Consult the tech chart above to see at what Tech Level each missile class gets the nuke option. Nuke option reduce thrust with -2G and have a price multiplier of x10. PEN & DAM +12 when directly impacting a target but they can also be proximity detonated for +3 DM to hit and PEN & DAM -6, proximity detonation is not a design option but a choice the missile operator can do when attacking.

Nuke attacks and defense
Nuke attacks work the same as for normal missiles but the target may defend using one laser battery and one nuclear damper battery. Ships with a functional Neutrino detector will know if a missile is a nuke or not, all others must guess. Firing a nuclear damper on non-nuke missiles has no effect, of course.

Proximity detonation
The nuke missile operator may elect to detonate the nuke some way off the target for a +3 DM and PEN & DAM -6. Damage from proximity detonations should use the Spray fire rules were the degrees of success give more hits rather than more damage at one hit.

  • VGood 3 Fair hits
  • Good 2 Fair hits
  • Fair 1 Fair hit

Nuke secondary effects
The X-Ray, neutrino and gravity burst from the detonation also affect nearby ships interfering with their sensors. Visual/IR and Radar lose any tracks unless they were popped down, Neutrino and Mass lose their tracks regardless. Max range for this effect depend on the size of the missile:

  • Small 1 square
  • Medium 3 squares
  • Large 5 squares

Fleet tacticians and nukes
Fleet tacticians allow their Ship tacticians to fly more dispersed formations. An Expert+ Fleet tactician allow his Ship tactician to have a wide enough separation from any nuke secondary effects!

Ripley: I say we take off and nuke the entire site from orbit. It’s the only way to be sure.

Hudson: Fuckin’ A!

Burke: Hold on a second. This installation has a substantial dollar value attached to it.

Ripley: They can *bill* me.

Subsidized merchant DataCard

Posted in Design system, Intercept, Rules with tags , , , , on December 1, 2013 by Mr Backman
Image courtesy of mr Ian Stead http://biomassart.wordpress.com/

Image courtesy of mr Ian Stead http://biomassart.wordpress.com/

“What a piece of junk!” – Luke Skywalker
“You came in that thing? You’re braver than I thought.” – Leia to Han 
“Would it help if I got out and pushed?” – Leia to Han
“It might!” – Han to Leia
“She’s the fastest hunk of junk in the galaxy.” – Lando Calrissian

Subsidized merchant DataCard

I have updated the DataCard and Intercept rulebook, get ’em while they’re hot, at the downloads page 2013-12-01

The design system holds everything there is to know about your ship but to use it for an Intercept space battle you need to fill in its DataCard. The DataCard holds all data crucial to space battles where the Ship.xls hold everything there is to know about the design. Print out DataCard.pdf and fill in your designs. We will use the Subsidized merchant as worked examples on how to fill in the DataCard. There is a ready-made Subsidized merchant and Launch document in the Designs.zip and eventually I’ll fill out the rest of my designs. OK, let’s get on with the worked example shall we. The little thumbnail above is the entire DataCard but I will break it down into pieces a comment on each part s it gets filled in. As always, go to the downloads page to look for the latest version of everything – the rules, the design system and sometimes also the DataCard may all get updates now and then.

DataCard1

First we write the ships name at the top left of the DataCard. To the right of the name we see some rows of checkboxes. The one labeled Turns can be ignored as it is used by the Deterministic optional rules indicating how many steps of turn the ship has for each of the four turns. The row labeled AB Initiative side A check the odd boxes and side B check the even boxes. These are used for tie breaking Initiative. The lowest row of boxes labeled Frac thrust is where you check the turns where your fractional thrust gives you an extra G. Look up Fractional thrust in the rule book for details, our Subsidized merchant happens to have  no decimal thrust when loaded or unloaded so we leave them unchecked.

DataCard2

To the right is a box for Size; +8 for our example. This is the target number for all Pilot rolls (and a Tactician rolls too, however unlikely in a Subsidized merchant).The Comp# box should hold your computers model number. Make sure there is room for the computer dice pool. These can can be used to improve all Pilot, Tactician, Attack, Defense, Sensors or Repair roll by rolling one or more dice from the pool and picking the two highest D6, every four turns the computer dice pool is replenished by the current Model #. We write 1: for our Model-1 computer. To the right of that are four boxes were we write the beam to-hit numbers for 1, 3 and 10 squares range and the missile to-hit value, all taking our ships Size into account. Look up the numbers and subtract Size to get your ships target numbers. These are the base numbers your enemy roll against to hit your ship. We write 4+, 7+, 10+ and 6+ respectively.

Write your ships Thrust Gs (Loaded/Unloaded)  in the Thrust box.  The last box in the top row, the Fuel box, holds how many GTurns worth of fuel the ship has, loaded/unloaded. The box is large enough for you to tick off fuel use when playing. Only ships with Fission or Fusion thrusters have this value, Impulse drives expend no fuel when thrusting and neither does a Floater, our ship write 10/20: here. Yes, the sub is known for its extremely low delta-V, that old-timer who belittled the sub crews has obviously never flown one as their low delta-V requires careful planning and experience.

DataCard3

The next row should hold the ships Streamlining type; Open frame, Normal, Streamlined or Airframe, also add the areobrake damage modifier for speed here. The name of the streamlining should be entered but also the damage modifier for speed which is important when doing areobrakes or landing. The damage per speed modifiers is from the areobrake table in the rulebook, in the section on planets.

  • Open frame The ISS or other irregular structures. +6/1 speed but you shouldn’t really do any areobraking with these. If you areobrake facing is off by two or more your first speed brake will be treated as Open frame. Hulls with Critical damage are always treated as Open frame.
  • Normal A car or a subsonic aircraft. +3/1 speed. If you areobrake facing is off by one your first speed brake will be trated as Normal unless it is Open frame. Hulls with Severe damage are always treated as Normal or worse.
  • Streamlined A jetfighter or the space shuttle. +1/1 speed. This is the minimum streamlining for reasonably safe areobrakes and atmosphere landings. Hulls with Light damage are always treated as Streamlined or worse.
  • Airframe The SR-71 or other extremely streamlined hypersonic designs. +1/3 speed. Areobrakes and atmosphere landings are safe unless your facing is off or brake more than your frame can handle.

We write Streamlined +1/1 and 7% 1 for the percentage of wings an extra areobrake (1 for every full 5%). Wings is only used for aerobraking in Intercept but may be more important in roleplaying situations, especially for the Subsidized merchant.

DataCard4

Below this there’s a large box where all the ships Signatures should be entered. If your battle takes place where the Sun factor is not +6 you should enter the actual value to get properly modified Signatures. Remember that if the Sun factor is, say +5 you should subtract 5 from Visual(Hull) when the ship is in the Shadow column, instead of the usual 6. Note the Sun factor at the top of your map sheet as a reminder.

DataCard5

The box with the ship status check boxes can be ignored as they are only used in-game to indicate status changes, I’ll show you their picture anyway.

DataCard6

Below that there are some boxes for the Sensitivity of your sensors. We enter -1 for our Optical (Visual/IR) and -5 for our small radar. Note that radar Scans are the only ones using any significant amounts of power.

DataCard7

To the right of this we have the crew box where the numbers and special notes of our crew are entered. We write 1 Pilot, 1 Astrogator, (2) Sensor ops, 3 Gunners and 2 Techs. The parenthesis around the Sensor ops value indicate that Gunners and Sensor ops serve dual roles; if any attacks or defense-rolls were made in a turn we get -2 on our Scan factor as the same crew members were doing both tasks.

DataCard9

To the right of this there’s the hit location box where damage, continuing damage, jury rig repairs and frozen watch revival is tracked. There are also check boxes for the current location of the repair crew. Enter the ARM and DAB values for you design here. The Subsidized merchant has these values: Hull +20 ARM +25 DAB Surface +15/+17 ARM +19 DAB Crew +20 ARM +22 DAB Payload +20 ARM +22 DAB Power +20 ARM +22 DAB Thrust +17 ARM +19 DAB The Surface part has 4 check box rows for Top/Front, Left, Right and Bottom/Rear and should be applied damage based on what facing the attk came from. The Power part may have two values; the left for full power and the left when Silent running, only ships with vulnerable radiators have two values there.

The column of check boxes labeled RC tells the current location of your Repair Crew. Check its location whenever it moves to a new location,Repair Crew takes the same damage when that location is hit. To the right of the RC column there is one labeled JR which stands for Jury Rig. Jury Rigged locations are treated as having one level less damage for damage effects purposes.

The check boxes labeled L, S, C and D are used for the damage level of a location and they stand for Light, Severe, Critical and Destroyed. Damage to an already damaged location work like this:

  • New damage level is higher Replace the old damage with the new, uncheck JR but CD remains.
  • New damage level is equal Add one damage level, uncheck JR but CD remains.
  • New damage level is lower Keep the old damage level, uncheck JR but CD remains.

The CD column stands for Continuing Damage which is damage that may get worse over time, like fires and the like. A hit gets Continuing Damage if the Damage roll turned up as a 6. Each turn, after repairs and if repairs failed, roll a D6 per CD; 1 and the CD is removed of itself, 2-4 has no effect and 5-6 increases damage one level. If a non-Hull location gets Destroyed from CD remove the CD there and add a CD to the Hull location, even if the Hull is completely undamaged. A Destroyed Hull, as you can imagine, destroys the ship. Yes, a tiny hit in the Surface location can, with lots of sheer luck, eventually destroy the entire ship.

DataCard10

The three boxes labeled Volley A – C are used to note endurance expenditure for missiles with longer endurance than one turn. If more than 3 volleys are in flight at the same time simply note this on a separate piece of paper. Below all is the area for weapons and mounts.

DataCard13

The right part holds the number and types of various weapon. Sand casters, Meson screen and Nuclear dampers write their ARM values in the PEN column and missiles treat the Range column as the controller range. Our Subsidized merchant has two sand-casters, two lasers and two missile launchers, one for each of the two large turrets mounted  Left and Right.

The right part holds the mounts of the ship and their respective locations. Our ship has 2 Large Turrets mounted on the left and right, each with one Sand-caster, one 10 MW laser and one Small missile launcher.

It should be self-evident how this work for your own designs. Note that different missiles can have different parameters and a ship may carry more than one kind so all variants should be noted so somewhere and each volley clearly noted what type it holds. A single volley can only hold one type of missiles but the launcher can choose which type it launches, even from a magazine.

Well, that is all folks. Look at the Lauch values and see if you understand how that design is put together. Note that the Small turret mounted on top is NOT standard issue but a modification done for my daughters Launch and can be a pretty nasty surprise to anyone believening that the Launch of a Subsidized merchant is harmless.